A pair of torn jeans, a scrap of old fabric, or a garment that’s starting to wear out doesn’t have to end up in the trash. Instead, they can serve as inspiration for a new design. This, in essence, is the spirit of Sashiko—a traditional Japanese embroidery technique characterized by small, repetitive stitches and geometric patterns. And if you enjoy craft hobbies that are both creative and a bit… meditative, you’re very likely to get hooked.
What is sashiko?
Sashiko has its roots in Japan and began as a practical technique with a very specific purpose: to make fabrics more durable and extend the lifespan of clothing. Particularly in rural and working-class communities, fabrics were valuable and not easily discarded. Using small, dense stitches, worn areas were reinforced, pieces of fabric were joined together, and garments were repaired so they could be worn for longer.
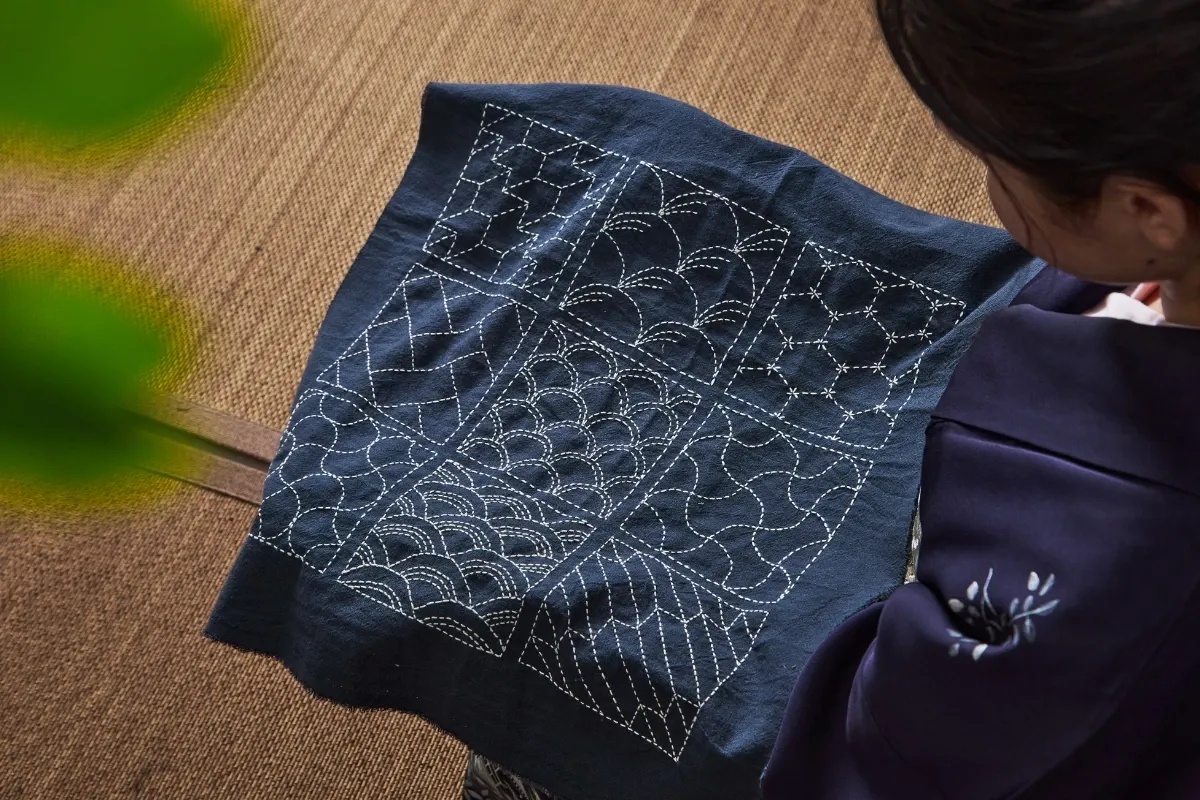
Over time, its characteristic geometric patterns have evolved into a distinctive form of decorative embroidery. Classic sashiko typically combines white thread with blue fabric, though today, many more color combinations can be found.
Why has sashiko become so popular?
Perhaps it is because sashiko fits perfectly with an idea that is increasingly central to the world of crafts: you don’t have to throw something away just because it’s damaged.
Worn-out jeans can be adorned with beautiful embroidery. A torn piece of fabric can be reinforced. And a simple bag can become far more interesting with just a few dozen stitches. Furthermore, there is something deeply rewarding about watching a repetitive pattern gradually take shape.
How is sashiko done?
The basic technique is not particularly complicated. What it requires most is steadiness and patience.
1. Choose the fabric
To begin, choose a sturdy cotton fabric that isn’t too thin. If you want to repair a garment, you can work directly on it, or add a piece of fabric underneath or on top, depending on the effect you’re looking for.
2. Choose the design
The patterns are typically geometric and repetitive.
Some of the most famous patterns include:
- Asanoha – a pattern reminiscent of cannabis leaves
- Seigaiha – repeating waves
- Shippo – an interlocking circular pattern
- Kikko – a pattern inspired by the hexagonal shell of a tortoise
Of course, you don’t have to start with something complicated. A simple geometric pattern is ideal for your first attempt.
3. Draw the pattern
Using a suitable fabric marker or pencil, transfer the design onto the fabric.
Take your time. If the design is crooked, your stitches will follow it precisely. Sashiko is many things, but it won’t automatically correct your lines—so pay attention!
4. Start stitching
The basic stitch is a simple straight stitch—essentially a series of small, straight stitches. The secret is to try to keep the stitches and the spaces between them as uniform in length as possible.
5. Continue the pattern
As you repeat the stitches, the design begins to emerge on the fabric. This is one of the great advantages of Sashiko: you don’t have to finish it quickly. You can work on it in small sessions, without needing to dedicate an entire afternoon to it.
What do I need for Sashiko?
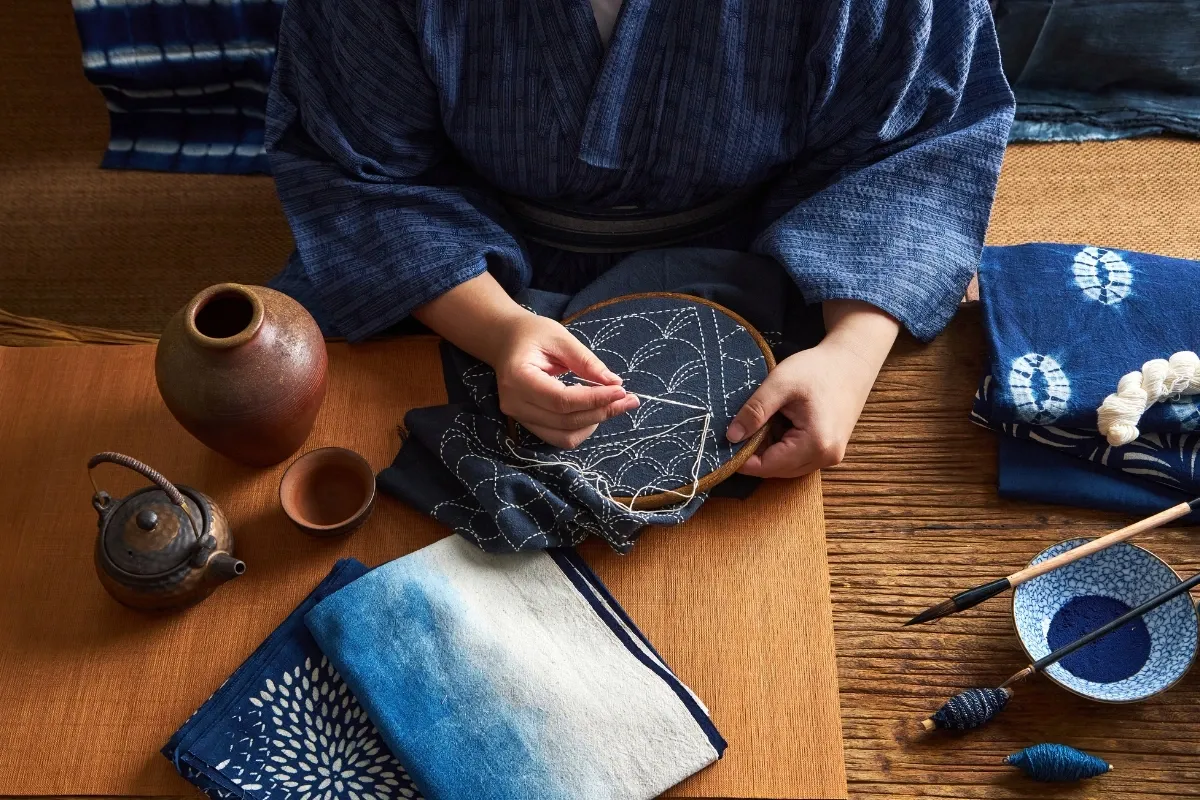
To get started, you don’t need much:
- Sashiko thread
- Sashiko needle
- Fabric
- Fabric marker or pencil
- Scissors
- Embroidery hoop (optional)
Specialized Sashiko thread is typically thicker than the thread used in other types of embroidery, ensuring that the characteristic stitches are clearly visible.
Sashiko for mending garments
This is where this hobby becomes even more interesting. The Sashiko technique is used to mend or reinforce worn-out fabric. Instead of trying to hide a tear, you can incorporate it into the design.
Is Sashiko difficult for beginners?
Not particularly. The basic stitch is simple, so you can get started even without any prior embroidery experience.
What does require practice is consistency. The stitches are small and repetitive, so over time, you will find your own rhythm. And if your first few stitches turn out a bit uneven—don’t worry, there’s no need to undo everything! It’s a craft, so it doesn’t have to be perfect right from the start!
Sashiko or traditional embroidery?
Sashiko is a type of embroidery, but it has its own distinct aesthetic.
The classic style features simple, repetitive stitches and geometric patterns; traditionally, it also served a practical purpose: reinforcing fabric.
If you enjoy colorful florals, a variety of stitch types, and intricate designs, you might prefer classic embroidery. If, on the other hand, you lean toward clean patterns, geometry, and repetition, sashiko might be exactly what you’re looking for.
Can I learn sashiko on my own?
Yes. You can learn the basic technique through books, tutorials, and beginner guides.
However, if you want to master specific patterns, stitch direction, and the proper way to handle the fabric, a sashiko class or workshop can make the learning process much easier.
HobbyDetective Spain is currently building its community and catalog of experiences. In the meantime, use these ideas to explore local options, and be sure to verify the latest details directly with each organizer.
A small sashiko sampler before repairing clothing
Make the first sample on spare woven fabric, not on a favourite pair of jeans. Draw one straight line, one corner and one small grid. This lets you see how your stitch spacing and thread tension change when the direction changes. A washable marking method should still be tested on an offcut first.
Use a needle and thread that pass through the fabric without forcing the work. Pulling the thread very tightly can gather the fabric and distort the pattern. Pause occasionally, lay the sample flat and check the surface instead of judging only the last few stitches.
Turn the sample into a repair plan
For a worn area, inspect the fabric around the hole as well as the hole itself. A patch needs to extend onto sound fabric; stitching only into fragile edges may not give the support you expect. Baste the patch, check how it sits when the garment moves and then work the chosen lines.
Decorative sashiko-inspired stitching and a durable repair have different priorities. A dense geometric pattern may look attractive but feel stiff in a place that bends. Before repairing a knee or elbow, test the flexibility of your sample. Keep a photograph and a note of the thread and fabric combination: it is a more useful reference for the next repair than a pattern you have never tried.
Frequently Asked Questions about Sashiko
What is sashiko?
It is a traditional Japanese embroidery technique that uses small, repetitive stitches to decorate and reinforce fabric.
Can I do sashiko if I’m a beginner?
Yes. The basic stitch is simple, and you can start with a small geometric design on a piece of cotton fabric.
What do I need to get started with Sashiko?
You primarily need fabric, Sashiko thread, a Sashiko needle, scissors, and a tool for drawing the pattern onto the fabric. An embroidery hoop is optional.
Can I use Sashiko to mend clothing?
Yes, and this is one of its most interesting applications. You can use the stitches to reinforce tears and worn-out areas, while also creating a decorative pattern.
What kind of thread is used in Sashiko?
Generally, a special thread is used—one that is thick enough for the characteristic stitches to stand out on the fabric.
Do I need an embroidery hoop for Sashiko?
Not necessarily. It can also be done without a hoop, depending on the project and the technique being used.
Which Sashiko pattern is good for beginners?
A simple geometric pattern with straight lines is ideal for starting out. This way, you can practice the basic stitch without getting overwhelmed by complex patterns right from the start.
Where can I learn Sashiko?
You can begin on your own using tutorials, or look for a class or workshop. Practicing with someone who knows the technique can be especially helpful for achieving the right thread tension and uniform stitches.
Related reading
Editorial revision and practical additions: HobbyDetective. The original publication date is retained. Original Greek article.